首先感谢Butterfly 作者jerryc ,提供了一个非常优秀的博客主题
2020.3.27 更新:
GL&HF
在阅读本文之前,确保您已经了解并使用过hexo-theme-butterfly 主题。
如果你还没有使用过,那推荐你一款美观大气的hexo主题:hexo-theme-butterfly
其实在主题的使用过程中也是新语言的学习过程。
1.在主题配置文件themes/Butterfly/_config.yml最后边添加如下配置
2.修改themes/Butterfly/layout/includes/additional-js.pug该文件内代码
1 2 3 4 5 ....省略.... function alignContent ( for (var n = $(window ).height()/!{theme.homepage.ratio}, e = document .querySelectorAll(".full_page" ), i = 0 ; i < e.length; i++) ....省略.... }
此处将homepage.ratio属性设置为2。首页效果如下:
1.修改主题配置文件themes/Butterfly/_config.yml的subtitle属性,例如修改前为:
1 2 3 4 subtitle: enable: true sub1: 所有的不平凡都来自平凡! sub2: All the extraordinary from ordinary!
修改后:
1 2 3 4 5 6 subtitle: enable: true sub: - 所有的不平凡都来自平凡 - 分享Java技术记录点滴生活... - 今天最好的表现是明天最低的要求
2.修改themes/Butterfly/layout/includes/additional-js.pug该文件内代码
1 2 3 4 5 6 7 8 script. var typed = new Typed(".subtitle" , { strings: '!{theme.subtitle.sub}' .split(',' ), startDelay: 300 , typeSpeed: 100 , loop: true , backSpeed: 50 });
将之前的单个读取,改为直接读取数组再拆分split(",")进行拆分,所以当sub中有逗号的话,用转义符代替
1.修改主题配置文件themes/Butterfly/_config.yml的ICP属性,为其添加国徽图标的路径pic:
1 2 3 4 5 ICP: enable: ture pic: /img/beian.png url: http://www.beian.gov.cn text: 浙ICP备12345678号
2.修改themes/Butterfly/layout/includes/footer.pug该文件内代码
1 2 3 4 5 if theme.ICP.enable .icp a(href=theme.ICP.url target="_blank") img.lozad(data-src=`${theme.ICP.pic}` onerror=`onerror=null;src='${theme.ICP.pic}'` style="padding:0px;vertical-align: text-bottom;") span=theme.ICP.text
修改后效果如下
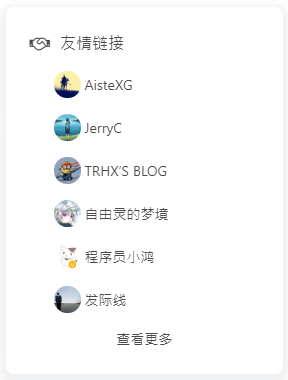
1.修改主题配置文件themes/Butterfly/_config.yml的aside属性,添加侧边栏友链属性
1 2 3 4 5 6 7 8 9 10 11 12 aside: card_author: true card_announcement: true card_recent_post: true card_categories: true card_tags: true card_archives: true card_webinfo: true card_links: enable: true num: 6 flink: http://www.larscheng.com/friends/
1.在目录themes/Butterfly/layout/includes/widget下新建文件card_links.pug
1 2 3 4 5 6 7 8 9 10 11 12 13 14 15 16 .card_widget.card-links .card-content .item_headline i.fa.fa-handshake-o(aria-hidden="true") span= _p('aside.card_links') each i in site.data.link if(i.class_name === "友情链接") ul.aside_category_item each item,index in i.link_list if(index <= theme.aside.card_links.num) li.aside_category_list a(href=item.link title=item.name+" : "+item.descr target="_blank") img.lozad(data-src=item.avatar alt=item.name onerror=`onerror=null;src='${theme.lodding_bg.flink}'` height="35px") item=item.name li.aside_category_list.find_more a(href=theme.aside.card_links.flink target="_blank") 查看更多
其中_p('aside.card_links')是根据语言环境获取侧边栏标题:友情链接。可以到themes/Butterfly/languages下进行添加
需要注意的一点是if(i.class_name === "友情链接")这个判断这里是用来判断需要显示的数据
Butterfly 的友情链接模板中存在多个class,通常我们只需要显示友情链接这一部分而已,所以会有这一判断
link.yml示例文件如下:
1 2 3 4 5 6 7 8 9 10 11 12 13 14 15 16 17 18 19 20 21 22 23 24 25 26 27 class: class_name: 友情鏈接 link_list: 1 : name: xxx link: https://blog.xxx.com avatar: https://cdn.xxxxx.top/avatar.png descr: xxxxxxx 2 : name: xxxxxx link: https://www.xxxxxxcn/ avatar: https://xxxxx/avatar.png descr: xxxxxxx class2: class_name: 鏈接無效 link_list: 1 : name: 夢xxx link: https://blog.xxx.com avatar: https://xxxx/avatar.png descr: xxxx 2 : name: xx link: https://www.axxxx.cn/ avatar: https://x descr: xx
3.修改themes/Butterfly/layout/includes/aside.pug文件,添加如下代码
1 2 if theme.aside.card_links.enable include widget/card_links.pug
需要注意改代码片段添加的先后位置,决定了它在页面上被渲染的顺序
修改完毕后,显示的基本效果如下:
这部分的修改适合强迫症晚期患者…
这个属于css样式的调整,你可以直接在浏览器调整为你想要的样式属性后
到themes/Butterfly/source/css/_layout/z-other.styl内进行修改
文章列表的图片样式:#recent-posts .post_cover
文章列表的内容预览样式:.recent-post-info
大小、比列都由你定。
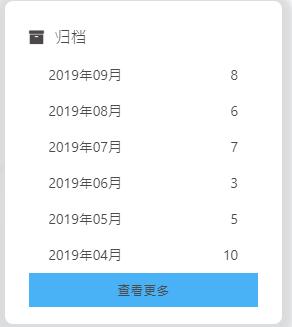
查看themes/Butterfly/layout/includes/widget/card_archives.pug发现它直接调用了list_archives方法
emmmmmm,能力有限我又去暴力改代码了…找到/node_modules/hexo/lib/plugins/helper/list_archives.jsif (style === 'list') {·······}内的内容
1 2 3 4 5 6 7 8 9 10 11 12 13 14 15 16 17 18 19 20 21 22 23 24 25 26 27 if (style === 'list' ) { result += `<ul class="${className} -list">` ; for (i = 0 , len = data.length; i < 6 ; i++) { item = data[i]; result += `<li class="${className} -list-item">` ; result += `<a class="${className} -list-link" href="${link(item)} ">` ; result += transform ? transform(item.name) : item.name; result += '</a>' ; if (showCount) { result += `<span class="${className} -list-count">${item.count} </span>` ; } result += '</li>' ; } result += `<li class="${className} -list-item">` ; result += `<a style="text-align: center;font-size: 13px" class="${className} -list-link" href="${link()} ">` ; result += '查看更多' ; result += '</a>' ; result += '</li>' ; result += '</ul>' ;
然后你看到的效果大概是这样的:
以上就是我在hexo-theme-butterfly 的使用过程中,个人修改的一些记录,如果你也钟意这些修改,不妨试试吧😁
GL&HF…😜